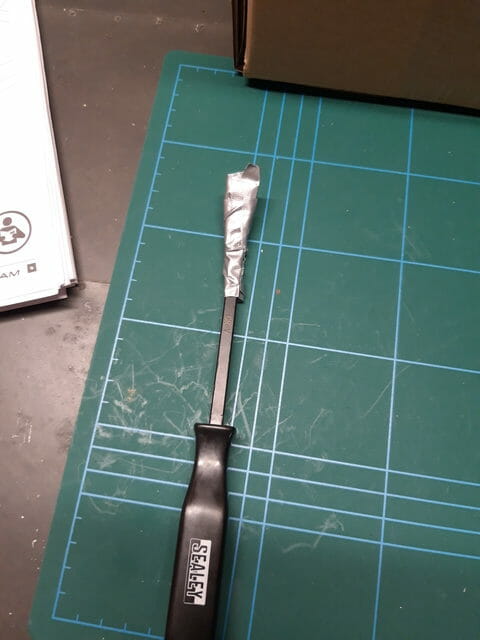
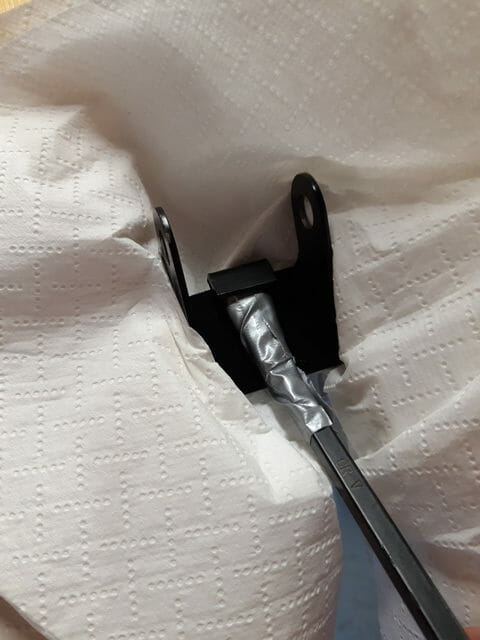
- Prepare headlights before fitting upper wishbone, so once the upper wishbone goes on you can fit the headlight.
- The supplied grommets are (in my opinion) not fit for purpose. They are too tight and it is a struggle to get cabling through them or to get them into place. Avoid wasting your time and pick up some grommets from amazon, I used some from that kit for both the headlight stem and the frame. I found a black tyre lever (used to change bike tyres) useful to maneuver the grommets into position without damaging any powder coating.
- When you first try to put the headlight stem on the car, the holes will not line up. This is because of the ¨hook¨ on the back of the stem. Use a pry bar to loosen this hook and you won´t need to drill or file anything.
- Test all bolts before attempting to do a final fit.
- I have the clear lens pack, but I am putting on indicators etc with coloured lens and will swap out after the car has passed IVA.
I used two excellent reference blogs for this step, Daniel French´s blog for the general construction of the headlights and also Caterham 420 detailed build blog for a few other points such as getting the stems to align and grommets.
Begin by prepping the bolts. Firstly, check that the holes are wide enough to allow the bolt through. Holding the stem at a 90 degree angle, check the bolt fits through the upper wishbone mounting holes and the headlight stem without issue. If it does not, file away any burrs or excess powder coat as before.
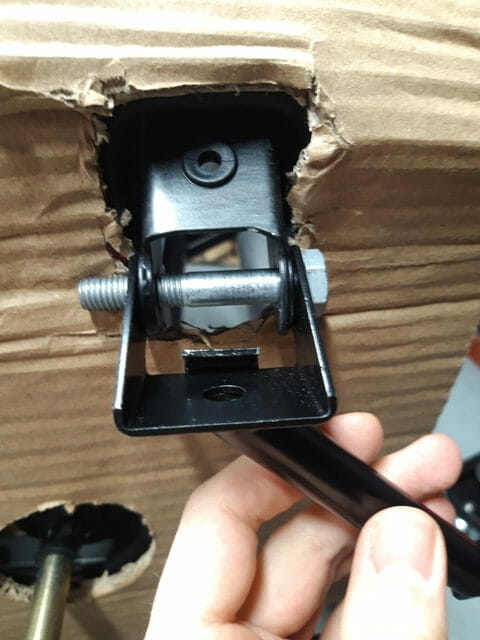
If the bolt fits put it to one side, and see what happens when you line up the headlight stem on the upper wishbone. You will most likely find that the holes do not align as documented on many blogs. To rectify this, you may need to loosen the hook on the back of the headlight stem using a pry bar. Use some duck tape on the pry bar to protect the paintwork, and then placing the headlight stem in a vice (I am using a trusty black and dekker work mate!), with something for protection, lever the hook up to create more space. Be very careful doing this, I nearly succeeded in removing a thumbnail when the pry bar slipped. It may require a fair amount of force. Apply some force, and then offer up to the upper wishbone mounting point again. By pushing the hook out, you will allow the headlight stem to move up so that the holes in the headlight stem can align with the holes for the upper wishbone.
Keep doing this bit by bit until you can successfully mount the headlight stem (with the hook properly tucked underneath the mount) and slide the bolt through. It will take some time to do, but save a lot of frustration later on.
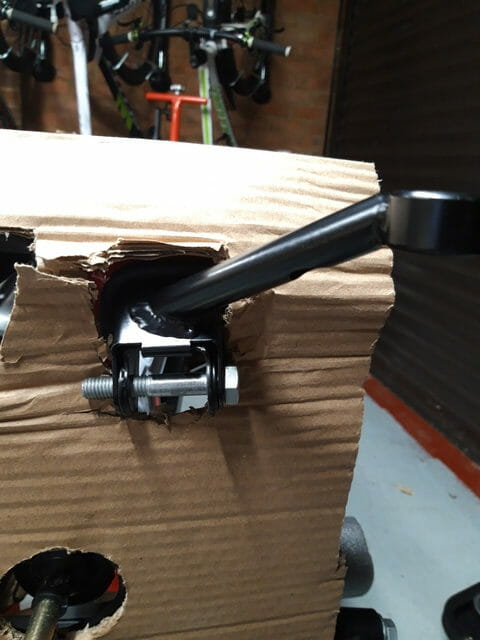
Grommets. The headlights require one grommet in the body work (where the wires will thread through to get into the car body) and one grommet in the oval hole in the headlight stem. The ones supplied by caterham are incredibly small and very shallow. The IVA (and general good practice) means that whenever you have wires meeting a metal hole, it is a good idea to put a grommet in place to protect the wires from chafing. You are welcome to try with the caterham supplied ones but I abandoned and used grommets from a separate set. The below pictures give an idea of the difference in grommet sizes.
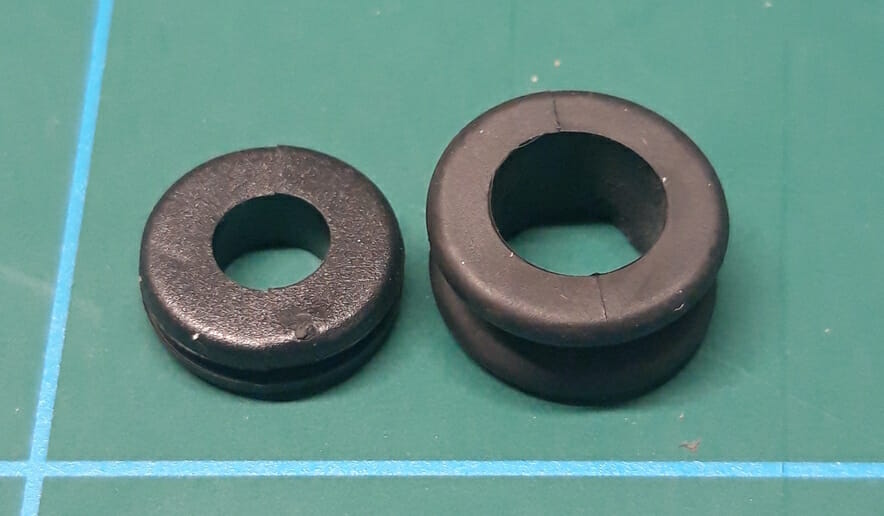
Put one of these larger grommets into the upper wishbone mounting now. You may need a tyre lever to fully push it in, combined with getting your hand on the inside and making sure it is properly seated
1. Prepare indicator
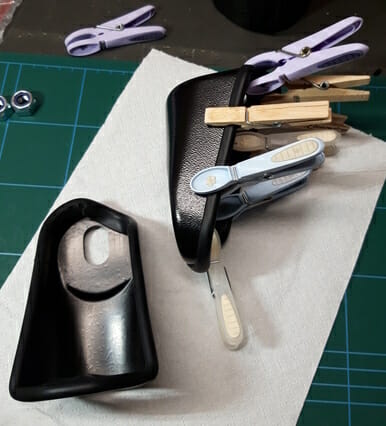
Note that the indicator pods are handed, this is indicated by L or R, again this is from the driver perspective. Fit the indicator light onto the pod – make sure that the slight hole is at the bottom, this is for any water that gets in to drain out.
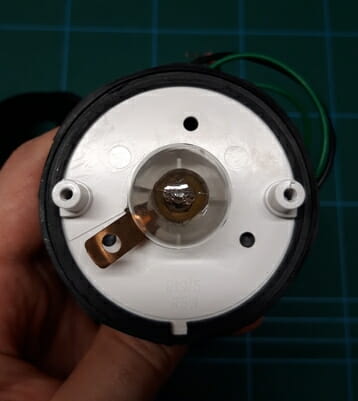
Remove the bulb, then screw the indicator light mount into the indicator pod with the three black self tapping screws. Note the copper metal tab in the 8 o clock position which protudes slightly. This is for the indicator earth. Make sure you put the screw on this hole through this tab, or the indicator wont work!
I do not have the carbon fibre indicator pod, I have seen others are provided with small bolts to do this. Once done insert the bulb and screw on the orange lens cover. Although I do have the clear lens pack, I am presenting the car to IVA with the standard coloured lens pack and will swap out to clear lens later.
Now apply 8cm of 8mm shrink wrap on the wires coming out of the indicator and apply heat using air gun. Once this has cooled, slide on 3cm of 13mm and 3cm of 10mm shrink wrap, but do not shrink this down yet.
2. Open up the headlight and install indicator earth.
Take the wires coming out of the headlight and pull off the caterham supplied plastic shielding. Thread these wires through in the following order – indicator pod, then mounting arm, then the washer and finally the nut. Tighten the nut finger tight.Put 5cm of 10mm shrink wrap on these wires coming from the headlight. Now take the wires coming from the indicator, and push the earth (black wire) up through the 5cm of shrink wrap, into the bottom of the headlamp and up into the headlamp itself. Undo the nut holding the existing earth for the main light, and add the earth from the indicator here. Note you do not need any loctite as there is a split washer.
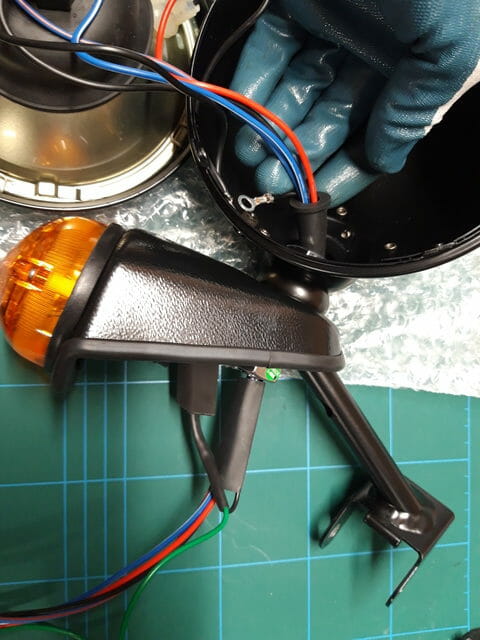
3. Apply shrink wrap to cable
Now take 30cm of 10mm heat shrink and push the indicator wire and the headlight wires all the way through it to make a T junction as below.
Push the 5cm of heat shrink up into the headlight stem and make sure it is out of the way. Now apply heat using the heatgun to the 30cm of 10mm heat shrink until nice and tight.
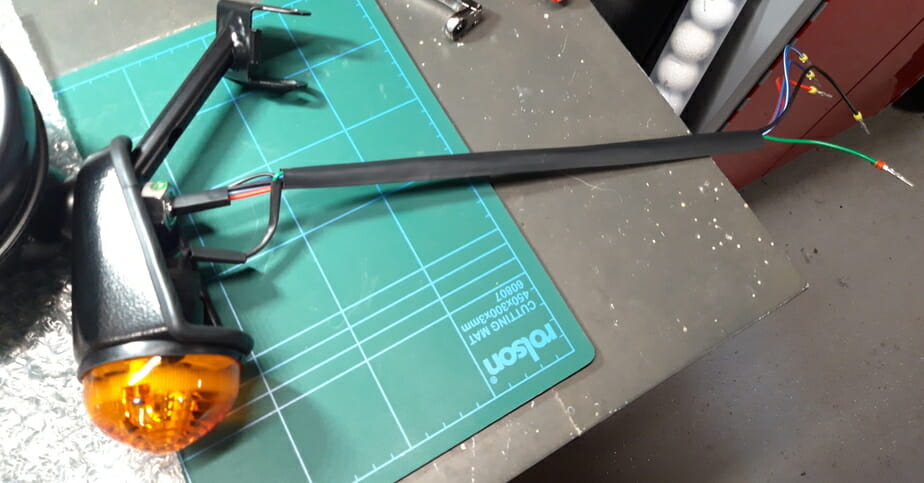
Once this has cooled, pull the 5cm of 10mm heat shrink down from the headlight stem. Then push the wires all together and about 2cm up into the 5cm of heat shrink, before again applying heat to the full 5cm of heat shrink.
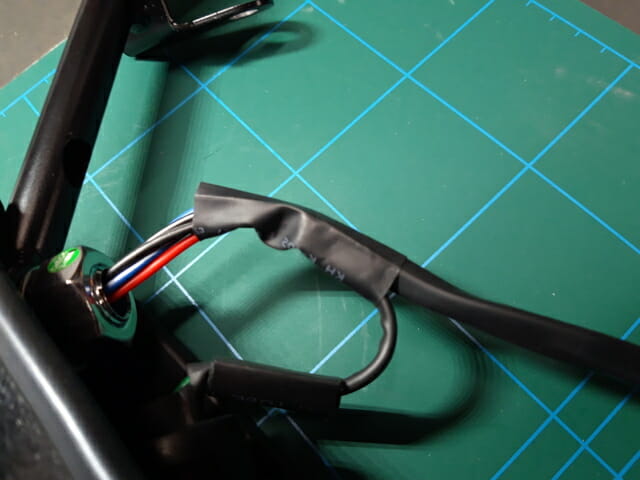
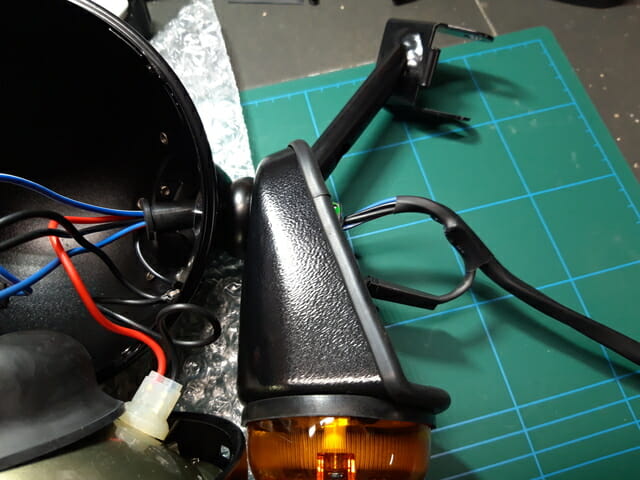
Once done, slide this up into the bottom of the headlight. In the headlight itself, you want to push the big fat grommet inside the headlight (not to be confused with the two smaller grommets) as far down as you can. It won´t go all the way. Then close up the headlight.
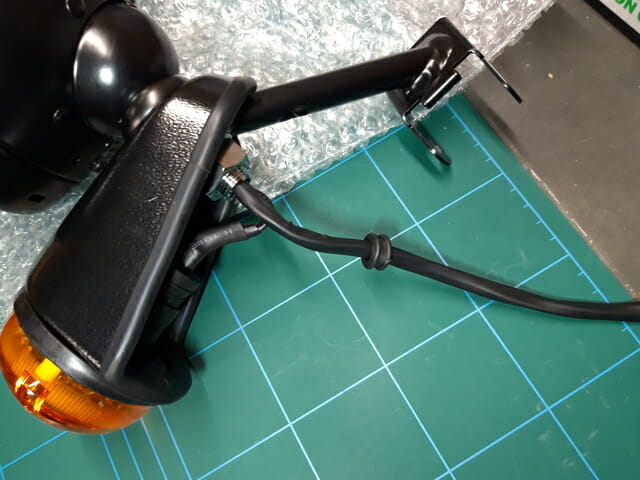
Once you have pushed up into the headlight, apply heat to the 10mm and 13mm heat shrink that is on the indicator and you should get the below.
4. Headlight stem
Now add the grommet onto the wire as shown in the picture above. Then you take all the wires and thread them gently through the headlight stem. Note this is very tricky to do – do not rush and take your time. Once you have pulled these through, it is time to get the grommet in place.
Making sure that you are using the grommet from the third party box, not the caterham supplied one, take a bike tyre lever (what you use to get the outer tube off when you change a bike tyre) and push the grommet into the headlight stem at the point which will be closest to the car body. In a very slow and gradual process, work your way around about 5mm at a time using the tyre lever to push this grommet into place. It will be quite hard at first and get easier. There is most room available on this headlight stem hole at the point closest to the headlight, so leave this bit until last to push into place. If required use some rubber lubricant, I did not use any.
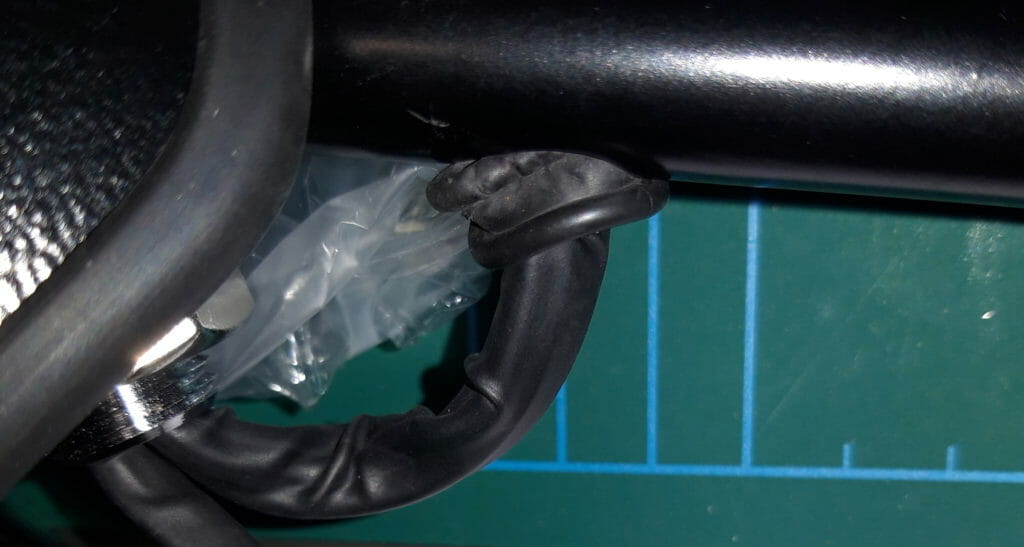
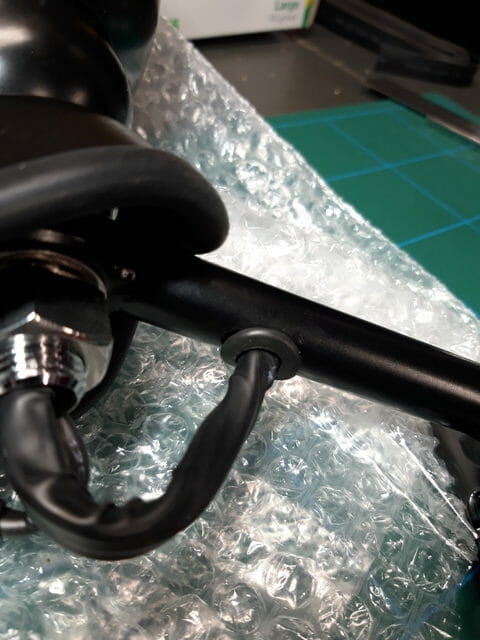
You should now have a completed headlight stem. Repeat instructions for the other side. Once headlights are fully prepped, proceed with mounting the wishbones.
