Notes
- Insulation tape on the top crossbars on the chassis underneath the pipe lagging. Toward the end you may need to remove the lagging for the final bit of room and the alternator can chip the powder coat on the chassis
- Make sure you have help. Ideally you want someone fairly mechanically minded with some strength. I enlisted my mate Steve. One of you can guide the engine and adjust the crane while the other one messes about in the engine bay and under the car.
- Be very careful you dont put your hands between the engine and the car, you can do yourself some serious damage if the engine traps your hand…
- Jack underneath the gearbox for extra safety
- Secure gearbox before securing engine arms
- Make sure you have 3/8in Hex bit for securing engine mount arms to the chassis.
- Clearances can be in the millimeters. Even a small nudge on the engine, without much force, can be enough to swing things into place so be prepared to jiggle things around a little bit
- Bear in mind with an engine crane that it may leak very slightly. A few times if we were repositioning things we would need to give the crane a couple of pumps to get the engine higher again if we waited too long.
This job took around 6 hours in total, so make sure you have plenty of spare time to get it done as it isn´t really something you´re going to want left unfinished overnight.
Set up the load leveller. From the hooks on the bottom of the load leveller to the lifting shackles on the engine, you can set the chain up to be as long as possible or a bit shorter. In hindsight, I would have set this up with fewer links, maybe 4 links between the lifting shackles and the hook on the load leveller. This would mean you don´t have to lift the crane as high which gives you more forward clearance.
Note also that the threads for the hooks on the load leveller are quite long. This gives you some flexibility later to adjust using a spanner when the engine is suspended, so try to set up the nuts so they are in the middle of the thread on the hooks when you start. Finally, it helps to have the handle at the front of the load leveller to stop it from fouling on the crane if you need a lot of elevation.
You want to make sure that you put something on top of the engine (I used an old curtain) to stop paint flaking off the load leveller onto the engine itself.
Lift the full engine, bellhousing and gearbox assembly up using the engine hoist. Have a bit of a practice moving it up and down to get comfortable with it now, instead of when it is dangling over the car! As mentioned above, it helps to have the handle on the load leveller at the front for easy access.
Get it over the front of the car with approx 30 degree down angle. You want to be going into the transmission tunnel as high as possible.
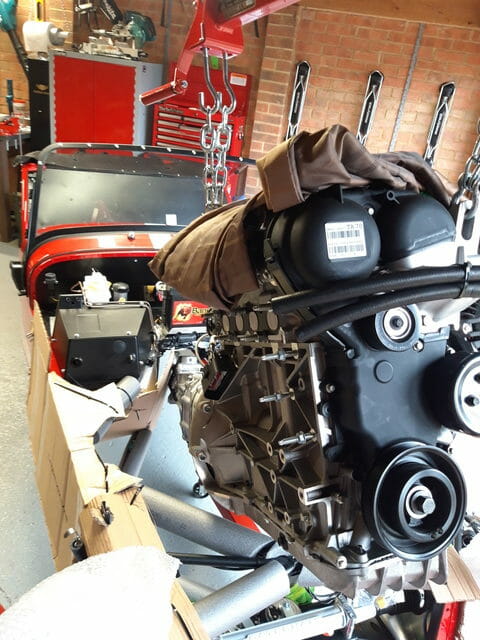
It´s important to not let the gearbox get too low too early, or too far along in the tunnel. You want your approach on the gearbox to be as high as possible, when you run out of room then start adjusting the angle using the load leveller and letting the hoist down slightly then repeating.
When you let the hoist down, it also has the effect of moving the engine forward slightly. Vice versa pumping the hoist up will move the engine back towards the front of the car. When you change the load leveller to make the engine closer to level, it moves the engine back slightly.
While I had a 30 degree angle going in, because the chains on my load leveller were a bit too long, I didn´t have the engine far forward enough at this point which made things a lot trickier. Everything here seemed to be measured in the millimeters and like with most jobs the first time you do it it´s just a learning experience!
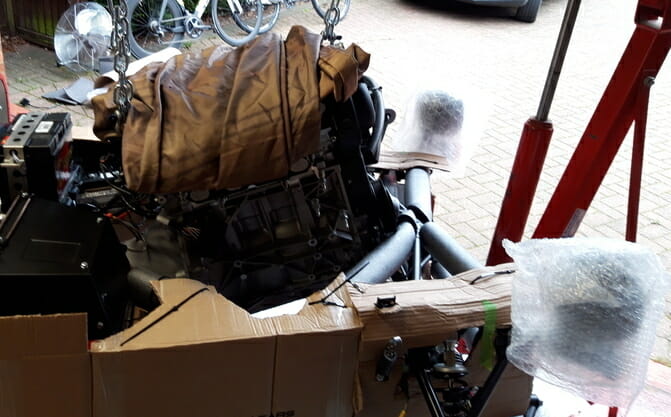
At this point it is key to start using the trolley jack to support the gearbox from underneath to make sure the gearbox is higher in the tunnel. Just make sure you are not jacking underneath the point where the bolts attach, or you won´t be able to get them on later. When you start supporting the gearbox it helps you get the front of the engine down, but if you have the initial approach too low, a bit of the gearbox will be sticking out underneath the car. Be prepared to back up if necessary and like with the other jobs, just keep at it you will get there eventually.
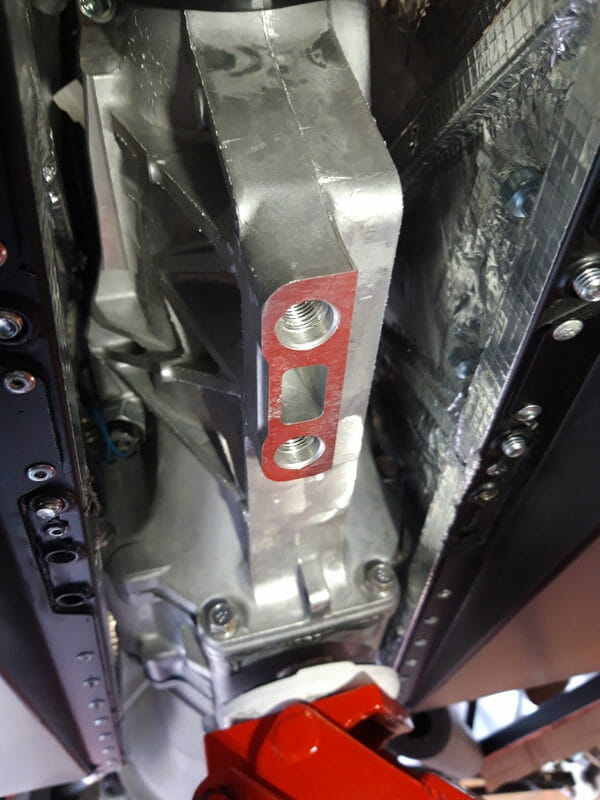
Once you have everything in a close enough position, the first item to try to secure is the gearbox mount to the bottom of the gearbox using the large 14mm bolts. The engine has the propensity to rotate clockwise (viewed from front of the car) due to weight distribution and where the mounting points are located. This is a bit of a battle to counter, a jack underneath the gearbox can help a lot, as can adjusting the nuts on top of the load leveller hooks. Locate the large bolts and get a few turns using fingers – again you don´t want to risk threading.
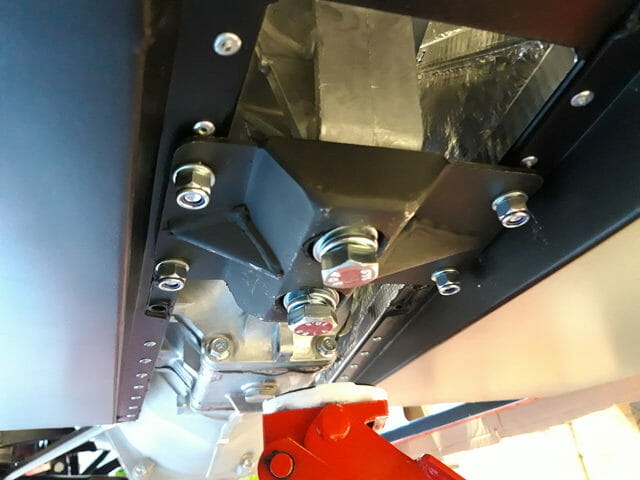
No threadloc required as split washers are used on the large bolts. Just a few turns, not too tight. Also be wary not to use the trolley jack to lift too much once this is in place as you may bend the gearbox mounting plate. Good idea to keep the trolley jack around for safety though as you tend to be underneath the car a lot.
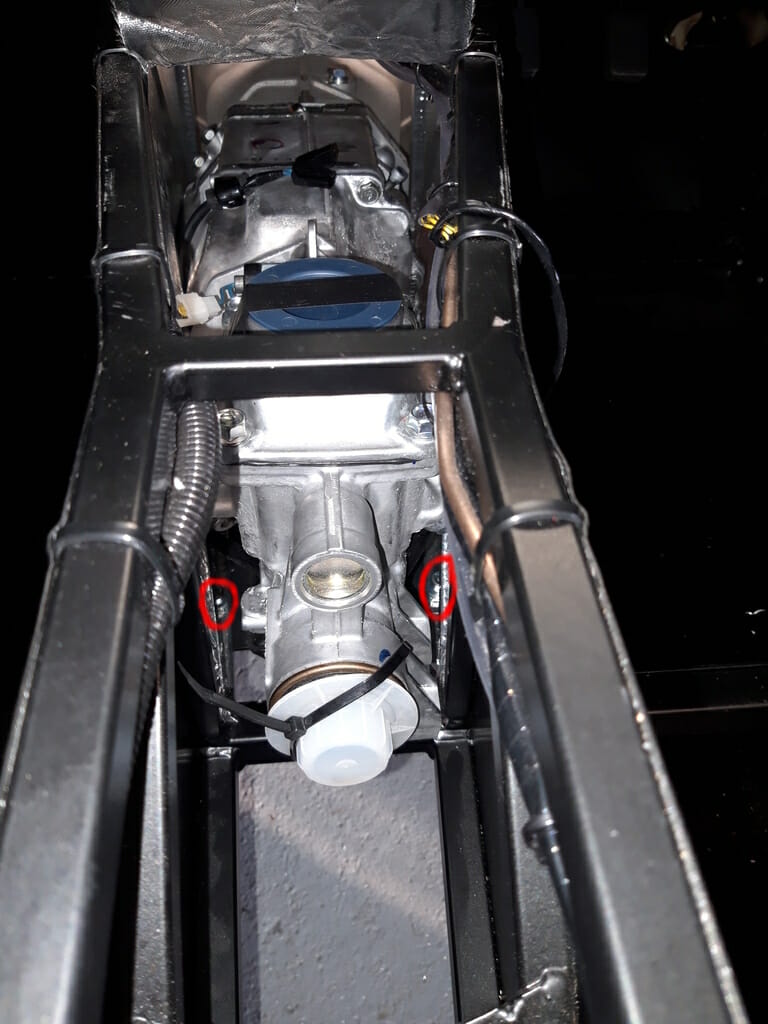
Ideally you will get the four bolts down from above to fit through the mount holes at the same time and be able to get the nuts on fairly quickly which will center the gearbox. If you need a bit more wiggle room, you can push these four bolts up slightly in the chassis to pull them down again later. I was definitely very glad I was fitting the bolts downwards! The below picture gives an idea of how much space you have to play with in the transmission tunnel. I was under the car, using a 6mm hex key on the top to hold the bolt and torquing the nut from underneath.
Loosely attach the engine mounting arms to the engine on both sides. Leave plenty of slack so you can move the mounting arm around. The hard bit is locating the 1/2 inch mounting bolt into the rubbers as the angles are slightly different, it may be easier to remove one or both of the bolts holding the rubbers to the chassis, attach the mount to the rubber, and then jiggle into place and push the bolts securing the rubber to the chassis back through again, which is what I did.
The process of tightening should be done a little bit at a time, varying the bolts that you are tightening. If you tighten just one or two bolts, it can pull everything else off and make it more difficult. At the end of the day there is very little tolerance at all. The tolerance seems to be the heatshielding in the transmission tunnel!
Be warned that with all these bolts it will look like it will never fit. Bit by bit you can make it work, just be careful not to crossthread anything.
Once everything has been done finger tight with a ratchet, start to torque everything up, starting with the gearbox mount, then moving to the bolts holding the gearbox mount to the chassis, then engine mounting bolts in rubber, engine mounts to engine, finally engine rubbers to chassis.
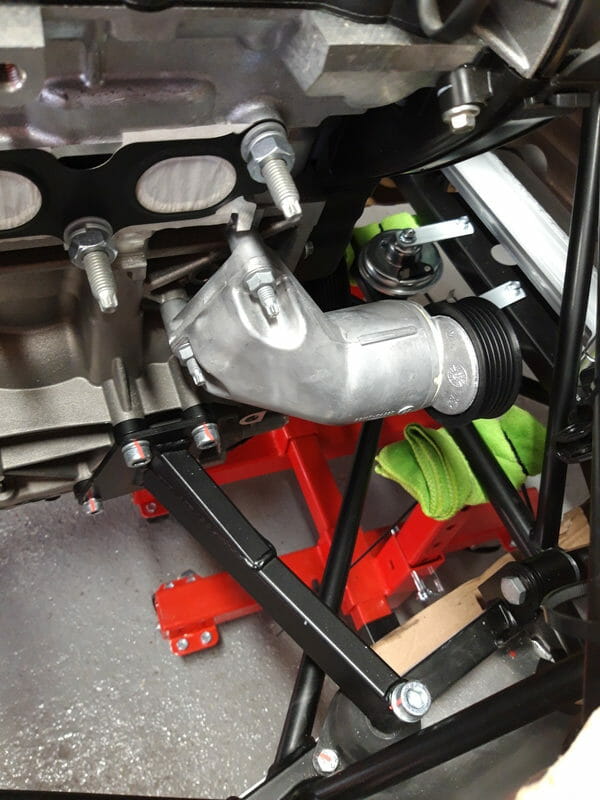
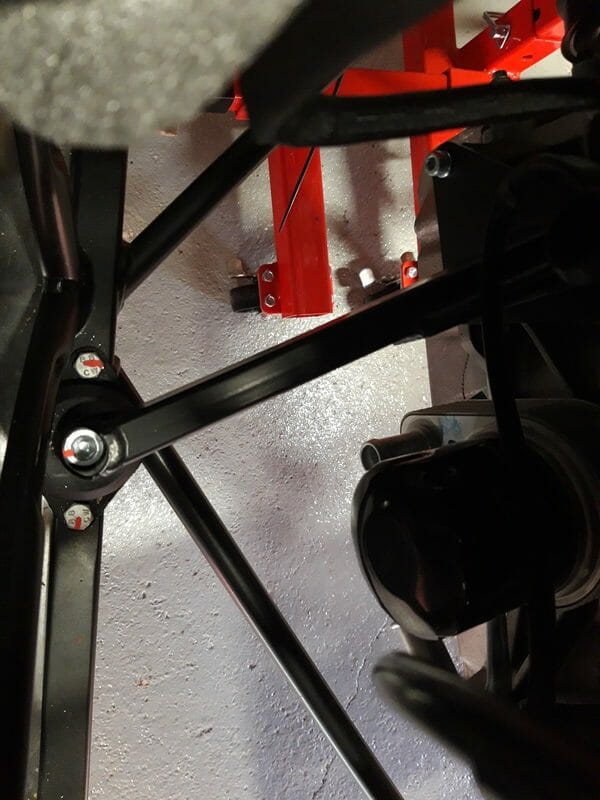
Torques I used :
| Torque Used | Connection | |
| 40Nm | Gearbox mount to gearbox (14mm bolts) | |
| 20Nm | Gearbox mount to chassis (6mm capheads) | |
| 41Nm | Engine mounting bolt to rubber (1/2in capheads) | |
| 20Nm | Rubber to chassis (M8 bolts) | |
| 28Nm | Engine mounts to engine (6 and 8mm capheads) | |
| 24Nm | Tensioner to engine |
Only take the hoist away once all bolts have been torqued. Reattach the tensioner (torque to 24Nm) and the timing belt, then use some hammerite to touch up any chips in the chassis!
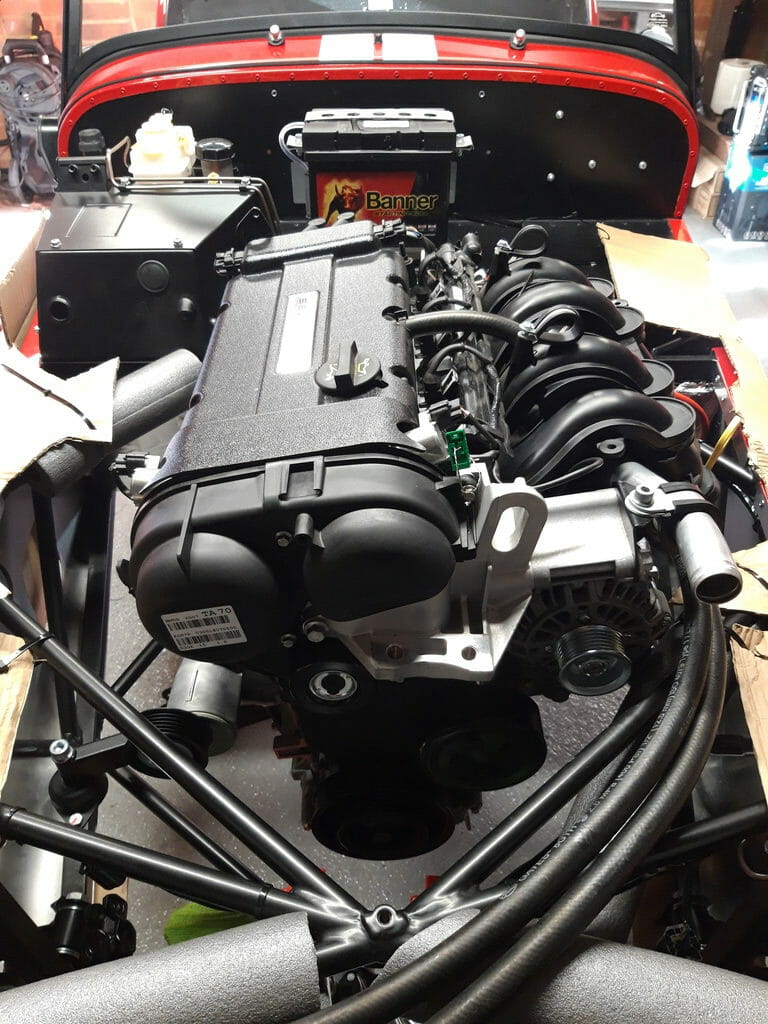
Just a note at the end…. If I was doing this again, I think I would actually try to do it differently from the manual and the blogs I´ve seen. Just looking at it now assembled and also having gone through this process, I almost think it would be easier if you use a trolley jack to move the gearbox and bellhousing assembly into place first. Secure very loosely with the gearbox mounting plate and leave the jack in place (from the side of the car) to provide additional support. I would then use the hoist to lift the engine, keep it level (no need for any angles), and then lower it directly into the engine bay, before joining the gearbox assembly and engine while it is in the car. You´d have to make sure the splines align first.
Looking at the completed job, I have access to all of the relevant bolts on the bellhousing… The only tricky ones would be around the starter motor, but it would still be possible to do. So if I had to do it again I would be very tempted to do it like that!!